The Fuel Tank - Phase 4: The Banging
Phase 4: Forming the Tank
With the template done, the next thing we did was dividing the model into three parts with similar size and difficulty. This took a while but we ended up with this division

As no one wants to do part 1 as it is the biggest and relatively the most difficult, we decided to do a raffle. In the end i ended up with Part 1 along with Jin and Zoey
Part 1: Me , Jin , Zoey
Part 2: Zeran, Tauqir, Ben
Part 3: Lornia, Kelvin, Natalia
With the parts assigned we then proceed on deciding how to apply the pattern to the metal sheet. Our part 1 group; Jin, zoey, and Me decided to do the blister for the overall shape before free forming it using techniques we learned from the previous assignment.
The Blister
To make the blister, we decided to measure where our parts are going to meet on the model and laser cut that slice and trace it onto a piece of wood then using the jigsaw to cut it out.


We made two of these template, we then slide the aluminium piece between and drill the two wood piece together and clamping them to make sure that the aluminium piece doesn't move while we hammer it.


After I got the overall shape, I then proceed into free-forming it to match the laser cut model.
Free-form
Before I start freeforming, I cut out the front curve of the tank first.
For the edges of the part, I used techniques i learned from the bowl, that is using the wooden stump/jig to get the overall curve of the sides, making sure it fits on the laser cut model. I then moved on to hammering onto the sand bag after the overall shape is attained to form it more precisely and getting rid of bumps. This process took a while, I learned that the wooden stump/jig for the bowl is not enough at it doesn't made it curve along the middle.

I then used the wooden stump we used for the torus and applied techniques i learned on that assignment, that is hitting it inwards to create the curves. I marked where the curves need to be on the inside of the metal part and then forming it using the wooden stump. Again this process of forming the metal to get it to fit takes forever


Hitting the metal too hard made it worse, causing the curve to be too drastic, however I knew I was going in the right direction, I just continued forming it onto the stumps and the sand bag. At this point it was a matter of figuring out which part needed to be open up (hitting it outwards) and which part needed to be closed in (hitting it inwards). Again, I marked on the inside of the metal piece and form it mainly on the sand bag. I also used the shrinker stretcher to curve it even more, mainly along the middle. I also trimmed the edges to make sure it fits to the marking on the model, this also makes it easier to form the sides.


After I was satisfied with the shape, I proceed onto the finishing touches
Finishing Touches
Using the sandbag again I tried getting rid of the big bumps before moving on to using the metal dolly. For this stage, I did one round of sanding using an 80 grit sand paper, which reveals low points of the bumps. I then used the nylon mallet and planishing hammer and hit it from the inside to get rid of the low points/bumps.

I manage to get rid of most of the bumps on the middle surface but I struggle with the sides as there is not much room to hammer to from the inside
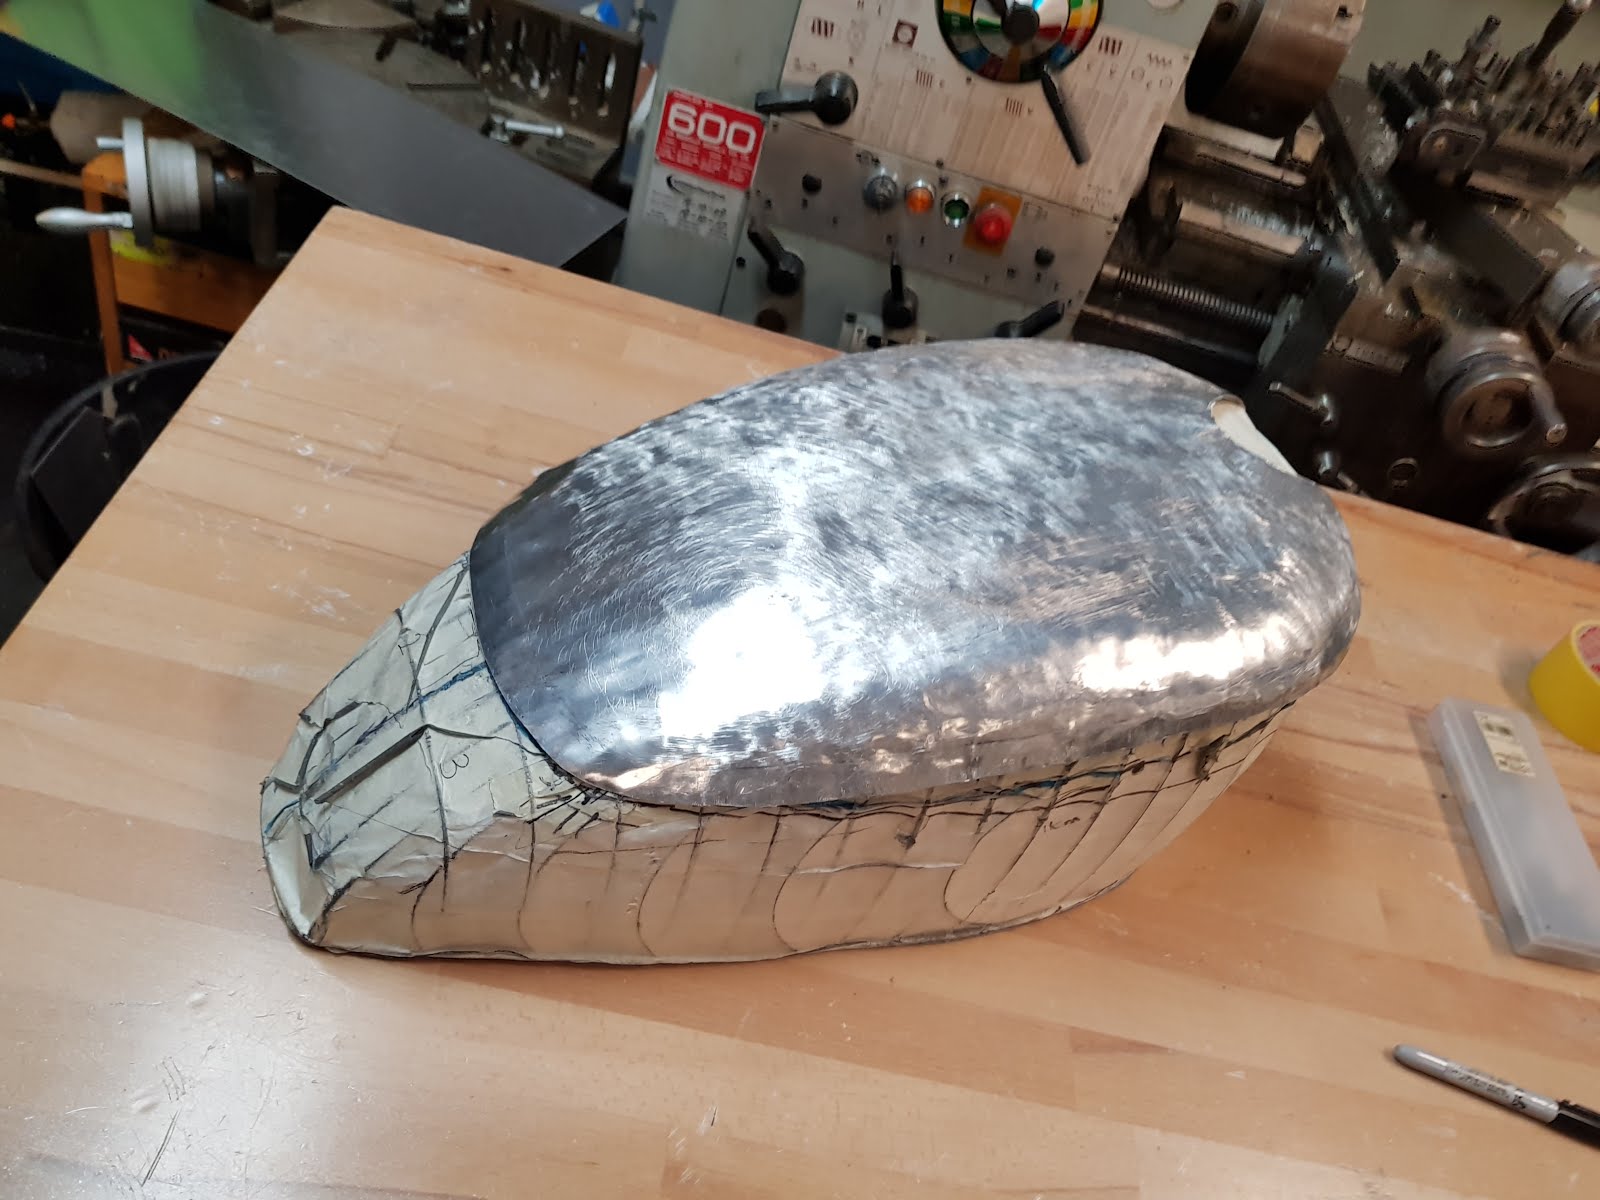
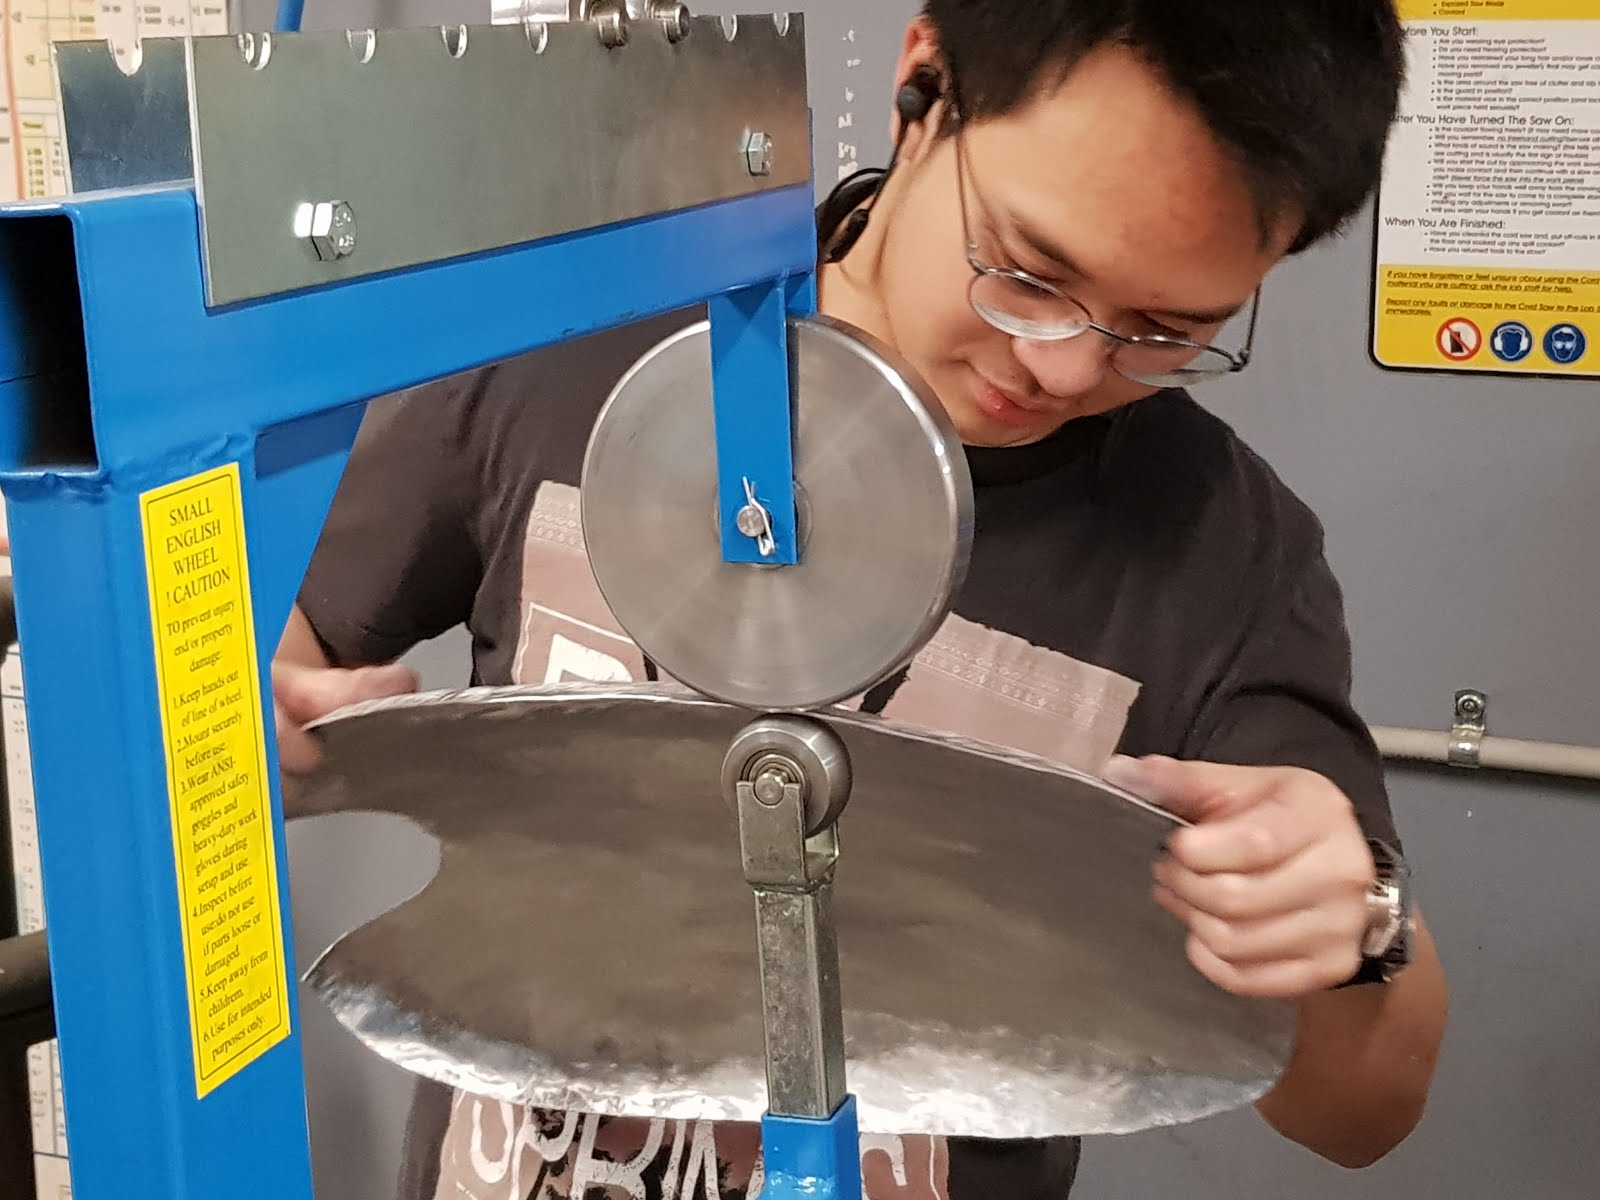
I went back to the model and saw that it fits almost perfectly, which is great I thought I was done but, big but, but I decided i wanted to get rid of the bumps on the side, so i figured that I used the English wheel.
I t w a s a m i s t a k e
The English wheel did got rid of some of the bumps on the sides BUT it also stretches the material and undo the curves. So I did the same process again; of using the shrinker, and hammer onto sand bag until it fits, marking spots that needed to be open up and spots that needed to be closed in.

After a while I got it to fit again and I decided not to form again as I don't want to make the same mistake twice.

Sanding & Polishing
The next stage is to sand and polish the part. I started with 80 grit sand paper then 120 grit then 240 grit sand paper, then wet sand using 400 grit, before moving up to 800 grit and finally to 1200 grit sand paper. After that I decided to polish it using a polishing compound I had before using Brasso and Silvo Polish.


I used Josco' polishing compound and buff (the white one compound and the white buff). I manage to get it to shine a bit but was not satisfied with the finish, some part were shinier than others making it look cloudy, I figured this happen because I didn't polish it uniformly plus the buff I used might be worn out and maybe the drill wasn't fast enough (I used the dremel to polish the bowl it worked way better). So I decided to polish it with Brasso.


Conclusion & Reflection
Overall, this was an enjoyable and insightful task. I was able to apply knowledge and techniques that i learned from the previous assignment into this one in a problem-solving sort of way. Although it was challenging, I found it to be quite fun, aside from the time I ruined my already fit part by using the English wheel. I was also able to learn something new such as a bit of Rhino 3D and 3DS Max which is great and may be useful later on in my career. The fact that this is a group work is also great, it helped me to get to know people from other discipline, and during the times we weren't working on the project, we were able to get to know each other as well as their discipline.
In conclusion, I enjoyed this task, it was challenging at times but insightful and was a great experience.
Comments
Post a Comment