The Reflection
As an Industrial Design student, model making is model making is no stranger to me, however, I've only touched metal once throughout my studies and it was just a simple cutting and bending of a 0.5 mm aluminium. The rest of the times, we usually made models from blue foams, 3D printing, and wood works, which is why metal working in this class felt like a whole new world. Throughout this class, I have learned new things and skills on metal shaping, which will be helpful in future model making especially where metal is involved and metal is quite common in product design.
For this critical review task, I chose to review the tray, as it is the one i found most difficult, and took me the most tries to nail it.
The Tray
The tray was the most difficult task for me, even more than the tank in my opinion. There's so much room for errors with the tray compared to the tank.
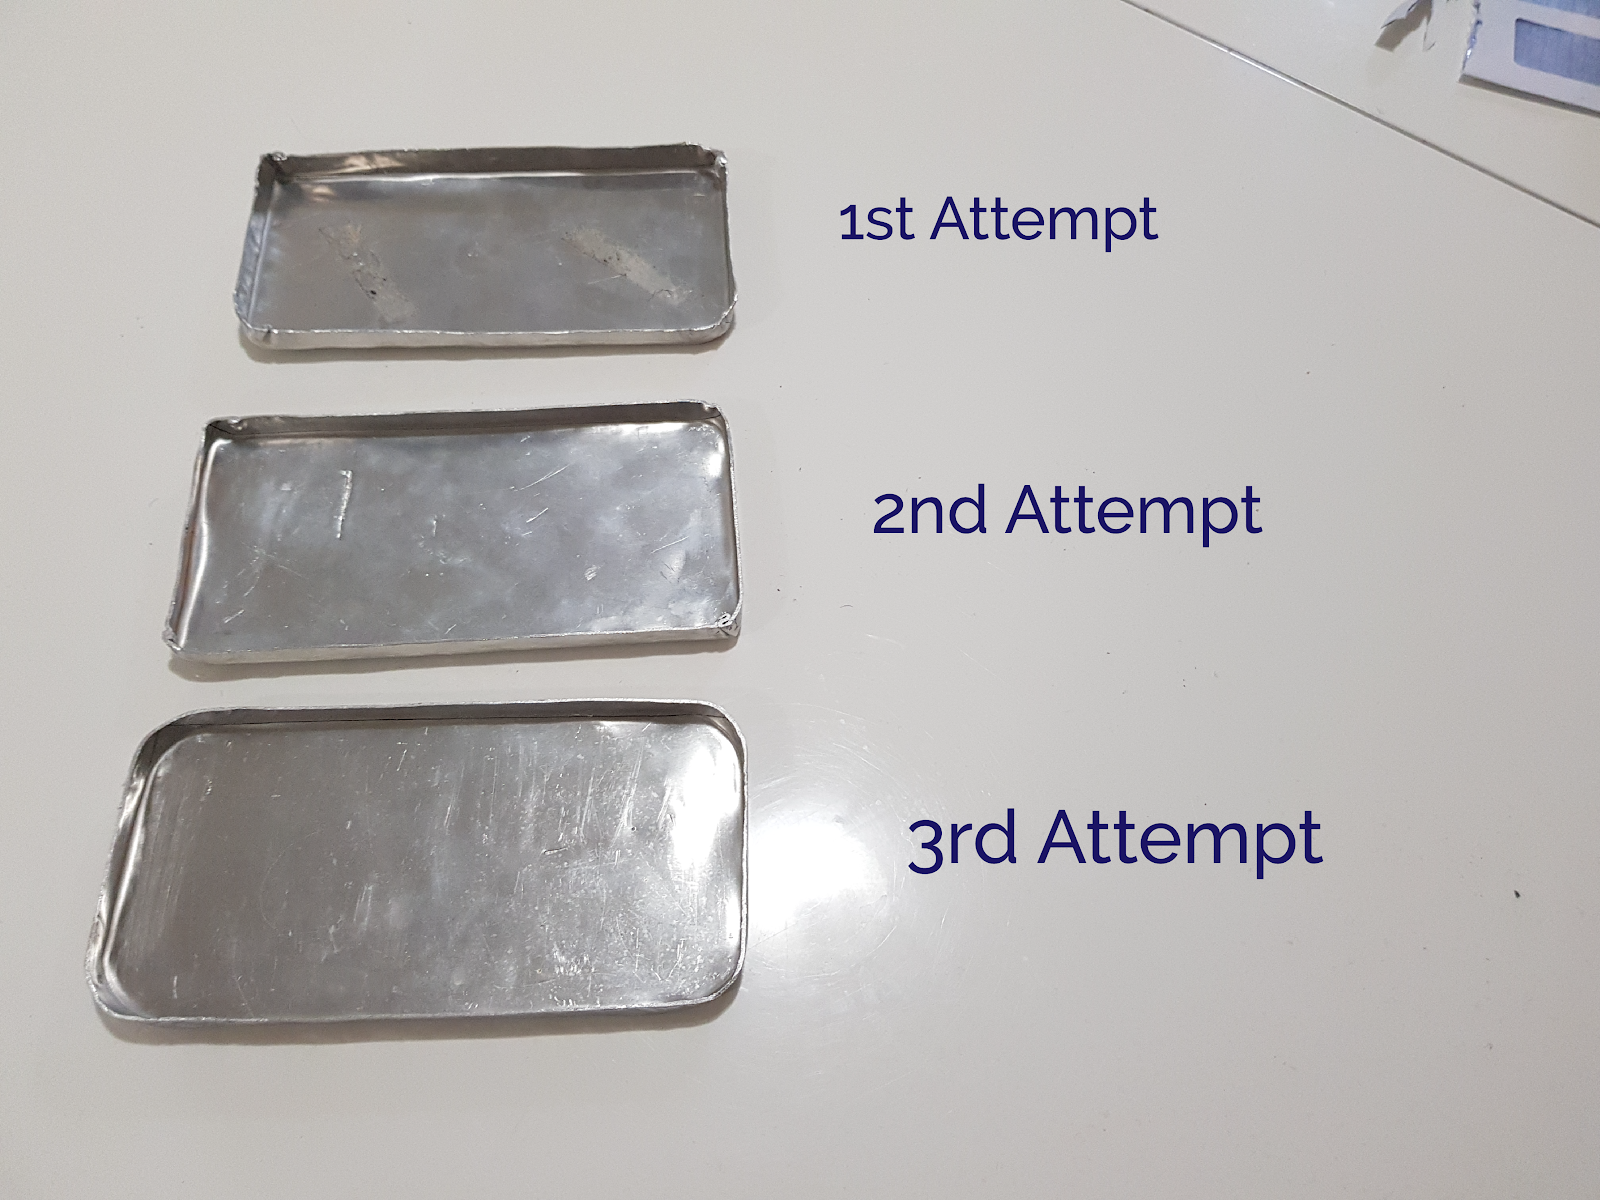
The tray took a total of 3 tries before i got a decent one.

From a distance, the tray looks fine, but upon closer inspection, you can see a lot of folding in the corners. I started the way the tutors taught us. That is cutting the aluminium to shape first using the templates. My partner and I decided to start with the smallest radius for the edge which is 30mm. After we cut the aluminium to shape, we double taped it to the wood template then we clamped them together before starting to shape it. We did what the tutors taught us to do, which is hammering towards the corner and then hitting the corner itself. However we found this to be really difficult. Each strike causes the metal to move a lot, after a couple of strikes, we ended up with tiny folds on the corners and there's nothing we can do to fix it.


With the 2nd attempt, I thought i have learnt my lesson, which is stop using brute force to hammer instead make each hits precise and controlled. This time I was able to make the edges smoother but I still ended up with little folds. I figure this happen because the radius of the edge is too small, which makes it easier for folds to happen because there are a lot of materials that are pushed to the corners. Another problem i had was the metal moving with every hit, even though I clamped it properly. Another issue was that the aluminium piece dug into the wooden buck, which made it difficult to remove.

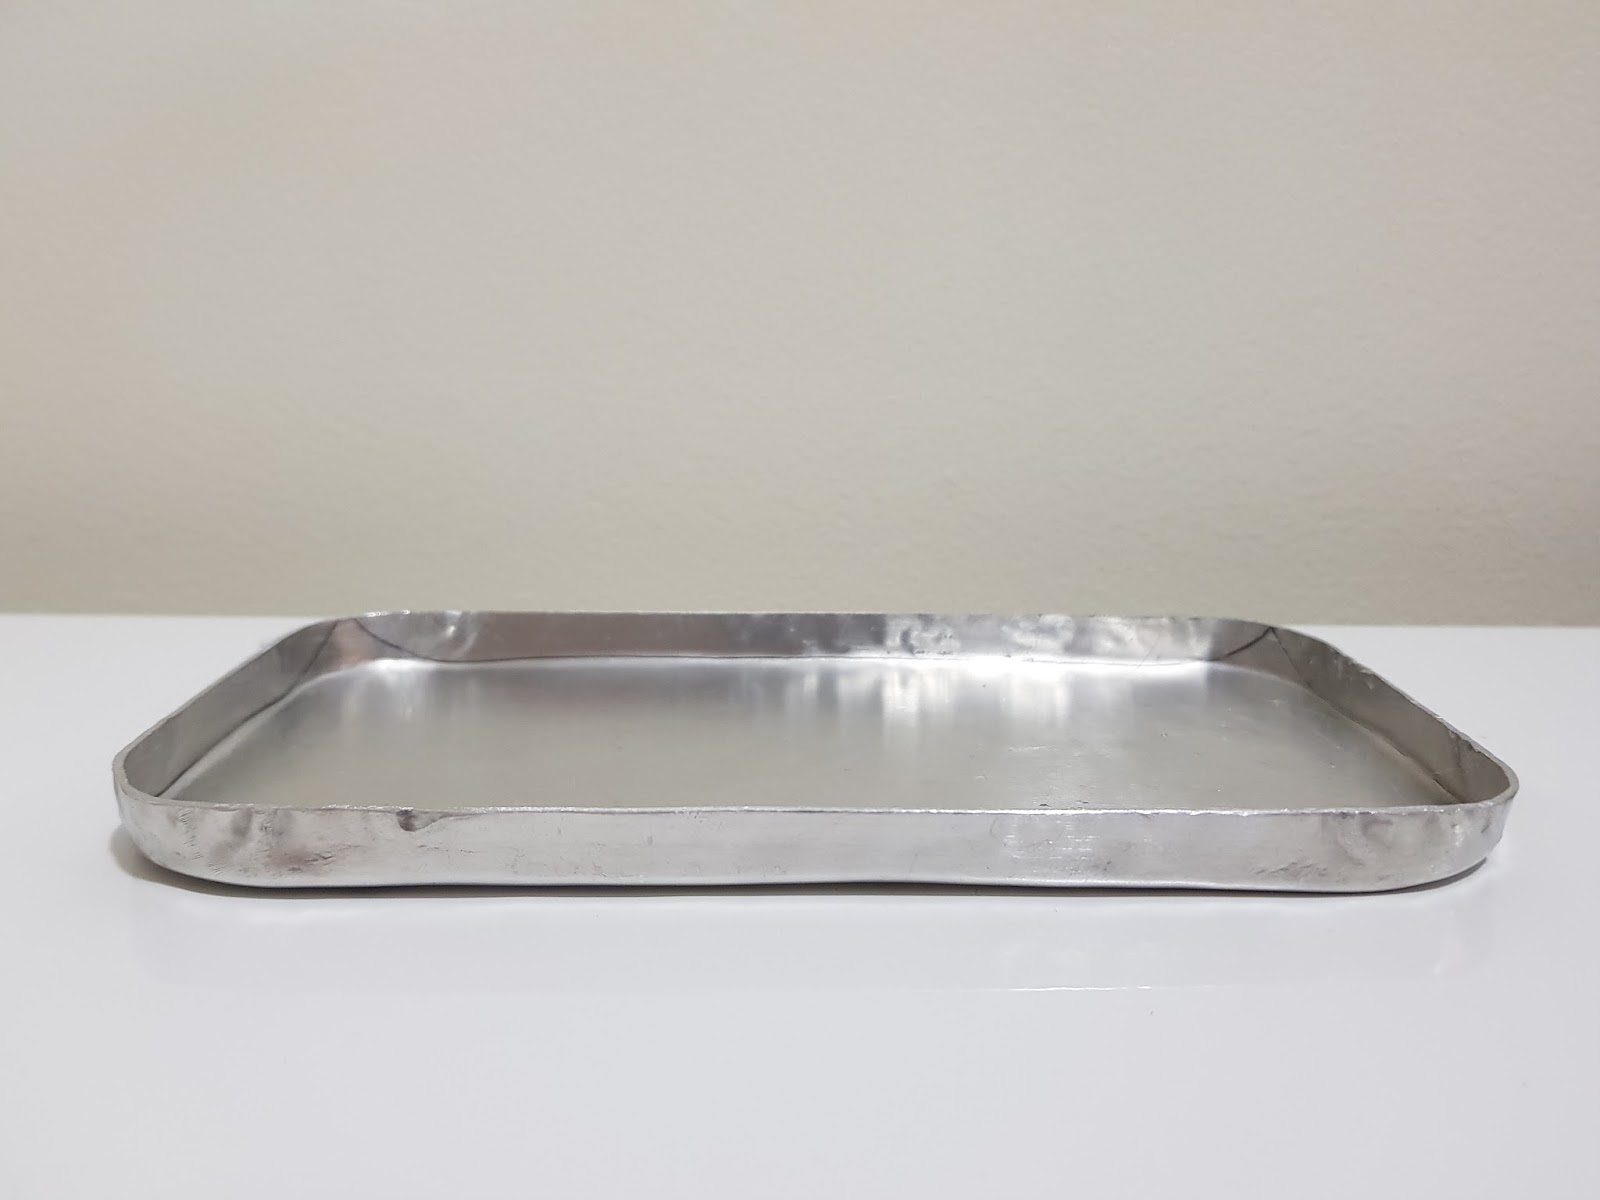
With the tray done, the next step was to polish it, however I am not 100% satisfied with the finish. As I didn't sand properly, there are a lot of scratches and marks from the hammer and mallets. I tried polishing using the polishing compound I got from brasco and a dremel. I managed to get some shine on it but not close to a mirror finish like I expected

Using the same polishing techniques, I manage to get a bit of mirror finish on my first task, the bowl.


With the bowl however, I spent the time to sand properly, starting from 80 grit sand paper, working my way up to 1200 grit. I started with dry sanding up to 240 grit, before wet sanding using 400 grit up to 1200 grit. These sanding session took at least an hour, and managed to give me a clean matte finish. I then use the dremel and the polishing compound to polish the piece which took about another hour and a half. The problem with the tray is that I didn't spend enough time with the sanding and the polishing. with the tray I just started with 180 grit sand paper before jumping to 240 then 400 then 1200 which gave a dirty cloudy semi-matte finish. I didn't spend enough time on the polishing as well, which gave me a shinier but not mirror like finish. If I were to do this again I would spend the time to sand with the lowest grit sand paper before moving up to the highest grit using some water to wet sand like I did with the bowl.
Overall, critically reviewing my tasks made me realise a lot of things such as mistakes and areas where i could've done better such as with the sanding for the tray. Throughout this class and through the different projects, I have learn a lot of useful things, things that will be helpful for my course and my future career.
The tray took a total of 3 tries before i got a decent one.
1st Attempt
From a distance, the tray looks fine, but upon closer inspection, you can see a lot of folding in the corners. I started the way the tutors taught us. That is cutting the aluminium to shape first using the templates. My partner and I decided to start with the smallest radius for the edge which is 30mm. After we cut the aluminium to shape, we double taped it to the wood template then we clamped them together before starting to shape it. We did what the tutors taught us to do, which is hammering towards the corner and then hitting the corner itself. However we found this to be really difficult. Each strike causes the metal to move a lot, after a couple of strikes, we ended up with tiny folds on the corners and there's nothing we can do to fix it.
2nd Attempt
With the 2nd attempt, I thought i have learnt my lesson, which is stop using brute force to hammer instead make each hits precise and controlled. This time I was able to make the edges smoother but I still ended up with little folds. I figure this happen because the radius of the edge is too small, which makes it easier for folds to happen because there are a lot of materials that are pushed to the corners. Another problem i had was the metal moving with every hit, even though I clamped it properly. Another issue was that the aluminium piece dug into the wooden buck, which made it difficult to remove.
3rd Attempt
With my 3rd attempt, my partner and I decided to go with the third smallest radius which was the 50mm one. To solve the issue of the wooden template moving, we decided to hit all four sides first, which locks the wooden buck in place before forming the edges. After the first few hits, instantly I found this to be way easier than the 30mm radius one. With the previous attempts, I removed the wooden buck with a chisel and a hammer, and I manage to scratch and dent the aluminium piece because of that. With the 3rd attempt however, I have learned my lesson, I decided to use the drill press to get rid most of the wooden material, before using the chisel to pull it out while being careful not to scratch or dent the aluminium piece.

With the tray done, the next step was to polish it, however I am not 100% satisfied with the finish. As I didn't sand properly, there are a lot of scratches and marks from the hammer and mallets. I tried polishing using the polishing compound I got from brasco and a dremel. I managed to get some shine on it but not close to a mirror finish like I expected
Using the same polishing techniques, I manage to get a bit of mirror finish on my first task, the bowl.
With the bowl however, I spent the time to sand properly, starting from 80 grit sand paper, working my way up to 1200 grit. I started with dry sanding up to 240 grit, before wet sanding using 400 grit up to 1200 grit. These sanding session took at least an hour, and managed to give me a clean matte finish. I then use the dremel and the polishing compound to polish the piece which took about another hour and a half. The problem with the tray is that I didn't spend enough time with the sanding and the polishing. with the tray I just started with 180 grit sand paper before jumping to 240 then 400 then 1200 which gave a dirty cloudy semi-matte finish. I didn't spend enough time on the polishing as well, which gave me a shinier but not mirror like finish. If I were to do this again I would spend the time to sand with the lowest grit sand paper before moving up to the highest grit using some water to wet sand like I did with the bowl.
Overall, critically reviewing my tasks made me realise a lot of things such as mistakes and areas where i could've done better such as with the sanding for the tray. Throughout this class and through the different projects, I have learn a lot of useful things, things that will be helpful for my course and my future career.


Comments
Post a Comment